Step1: Power Connection
The NerdAXE 500Gh/s which equipped with a 100~240V AC adaptor,with 5V output is designed to work with any voltage worldwide.
Plug the power cable into a wall outlet. Connect the other end to your NerdAXE.
Step 2: Initial Boot-Up
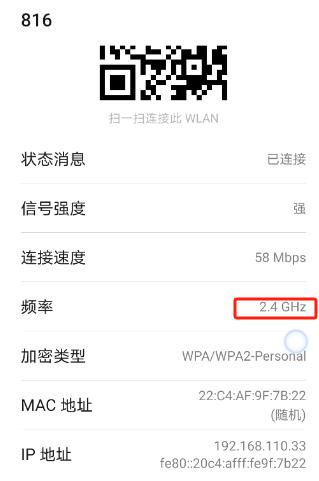
Make sure your smartphone or computer is connected with 2.4GHz Wi-Fi.
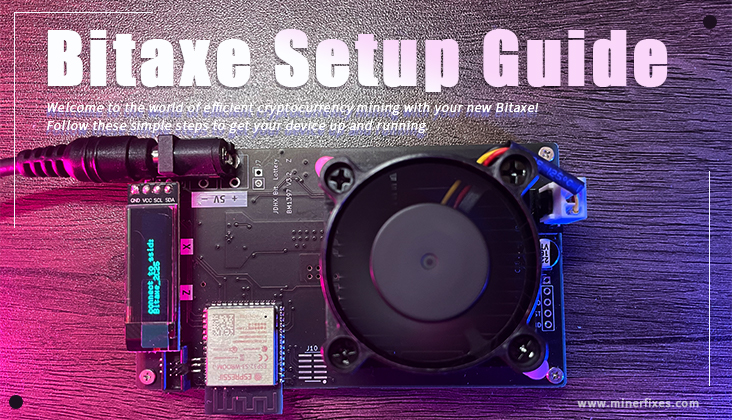
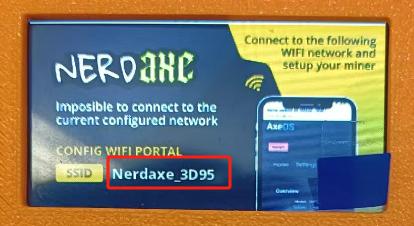
Wait for the NerdAXE screen to display "NerdAXE_****". This indicates the unit is ready for setup.
Step 3: Connecting to Wi-Fi
On your smartphone or computer, search for available Wi-Fi networks.
Connect to the "NerdAXE_****" network. Please be patient as this might take a minute.
If prompted to continue connecting without internet access, select 'YES'.

Step 4: AxeOS Setup
Once connected,the AxeOS web portal should automatically open for setup. If it doesn't, manually visit msftconnecttest.com. Or visit http://192.168.4.1.
Step 5: Configure WiFi Settings
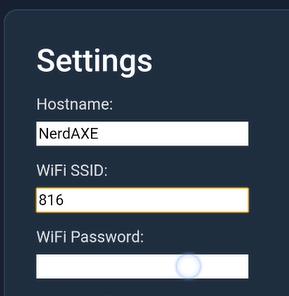
In AxeOS, navigate to 'Settings'.
Name your device into “Hostname”
Enter your Wi-Fi details:
Wi-Fi ID: Enter your 2.4G Wi-Fi SSID.Note: NerdAXE devices are not compatible with 2.4GHz Wi-Fi (Contact your internet provider if unsure about your Wi-Fi frequency).
Wi-Fi Password: Ensure accuracy to avoid connection issues.
Step 6: Customizing Your Miner
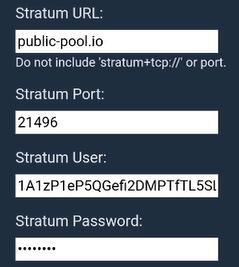
Stratum URL: Enter the URL of any bitcoin pool supporting your mining. Do not include 'TCP://' in the URL.
Stratum Port: The port number of the pool you selected.
Stratum User: Change this to your username registered in the pool to receive mining rewards.Or the main-net wallet address
Step 7: Save and Restart
Click Save, then click Restart to apply the changes.
Step 8: Start Mining
If everything is configured correctly, your NerdAXE device will start mining.
Step 9: Change your setting
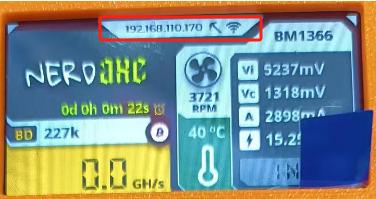
Enter the IP address display on the device screen into your browser to open the AxeOS web portal. You can change your setting now.
 88030.03USD
 68.36USD
 1.88USD
 0.12USD
 2960.04USD
 11.31USD
 896.35USD
 123.07USD
 0.11USD
 0.04USD
 0.12USD
 Favorites
 History


